Assignment 10-18
|
Adobe CC Video tutorials- Introduction to Photoshop |
https://www.photoshopessentials.com/basics/type-on-a-path/
Complete the tutorial above
Then
Go online and use the Pen Tool to draw a path around a part of the photo Choose a photo that has a complex shape to it. No simple circles! .Be sure that in the upper left information bar, that you have 'Path' selected instead of 'shape'. This way, you are essentially drawing an invisible line instead of it filling with color as we did yesterday. Be sure to close your path by returning to the first point that you started with.
Once your path is complete, use the text tool to add words to your path. Make sure the font size is appropriate for your photo.
Post both of these exercises to your tutorials page

| open_images1.jpg |
| open_images2.jpg |
| interface.jpg |
| zoom.jpg |
https://www.youtube.com/watch?v=6jVw-GNRy0I
|

|
Photo Genre Research |

How to Set Up Your Weebly
Go to weebly.com Sign up by entering your full name, email, and password Accept the terms for using the sight and click on the “Sign Up” button Choose a title for your sight Click on the Designs tab and choose a theme or look for your website Click on the Page Tab Click on the Orange “Add Page” button Choose a Standard Page Type the following Page Names one at a time, clicking on the orange “Add Page” button each time. - Home - Tutorials -Weekly Write -Projects -My Photos | ||||||||||||||||
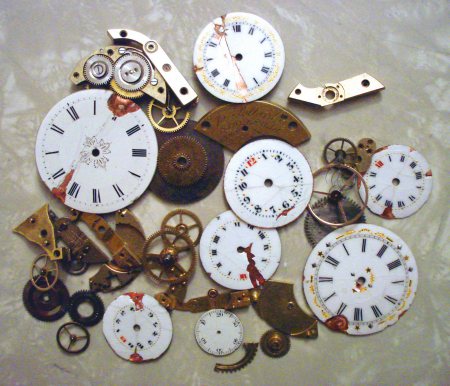
| clock_parts.jpg |


Tutorial 1 Review- 5 points
--Open the image titled Clock_parts above. Using the tools we practiced in class, do the following:
Use the elliptical marquee tool to select one of the clock faces. Remember that holding the shift key down creates a perfect circle.
Holding the space bar down with the shift key allows you to alter the size of the circle while trying to position it where you want it.
--Use Image>Adjustments to make the selected clock black and white, then select the tint box and change its color using the sliders.
--Do an Select>Inverse to then select the background around the clock you just changed.
--Use Image>Adjustments>Levels to darken the selected area by sliding the dark "Hershey's kiss"
--Use Image>Adjustments>Posterize. This should only effect the areas surrounding your tinted clock face. Deselect (Ctrl D).
--Use the text tool and type Time Is Of The Essence in a large font
--Highlight the text and change its color
--Go to File>Save As> and title this Tutorial 1 Review, and save your file as a JPEG, low qualtiy. Save to H drive or Desktop.
--Place this image on your weebly tutorials page
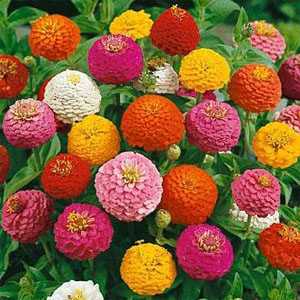
| zinniamix.jpg |
Tutorial 2 Review- 5 points
--Open the image titled Zinniamix below. Using the tools we practiced in class, do the following:
--Use the dodge tool to lighten some of the flowers.
-- Use the burn tool to darken some of the flowers.
-- Use the rectangular marquee tool to isolate one flower you want to change the color of.
-- Go to Image>Adjustments>Replace Color
--Use the first eyedropper and click somewhere in the flower
--Use the second eyedropper with the + and click within the black square until the flower shape reads as a white silhouette.
--Adjust the sliders to choose a new color for your flower.
--Save As, type file name Zinnias, format JPEG, low quality. Save to H Drive or Desktop
--Place this image on your weebly.
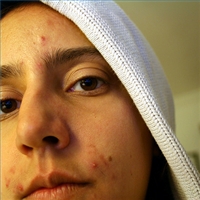
tutorial 3 Review- 5 points
Google a photo of someone with a combination of blemished and wrinkled skin.
Use the healing tools to improve their appearance while keeping them looking natural.
Post before and after photos on Weebly.
Google a photo of someone with a combination of blemished and wrinkled skin.
Use the healing tools to improve their appearance while keeping them looking natural.
Post before and after photos on Weebly.
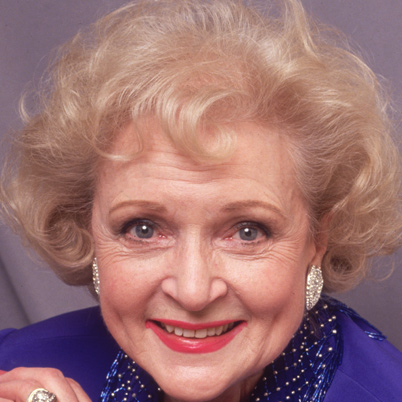
| acne-face-treatments-200x200.jpg |
| betty-white-9542614-1-402.jpg |
| marotzkeface.jpg |
|
Tutorial 4 Review- 5 points
Google 10 of your favorite things. Copy from internet and paste into a photoshop document. 10x10 inches, 150 resolution. Use the selection tools to separate the image from the background when possible. Arrange the layers and images so that the 10 things look like a collage. Use the text tool to add your name to the collage |
Tutorial 5
Choose a photo from the internet in sharp focus and showing bright colors.
Use the masking mode to protect what you want to stay in color. Make sure to use a hard edged brush. Alter the diameter of the brush as necessary.
Change the rest of the image to black and white.
Choose a photo from the internet in sharp focus and showing bright colors.
Use the masking mode to protect what you want to stay in color. Make sure to use a hard edged brush. Alter the diameter of the brush as necessary.
Change the rest of the image to black and white.
| babyblueblueeyescuteface-8c78bcdcaff043dc23286b08642caa89_m.jpg |

|
| downloading_a_brush.docx |
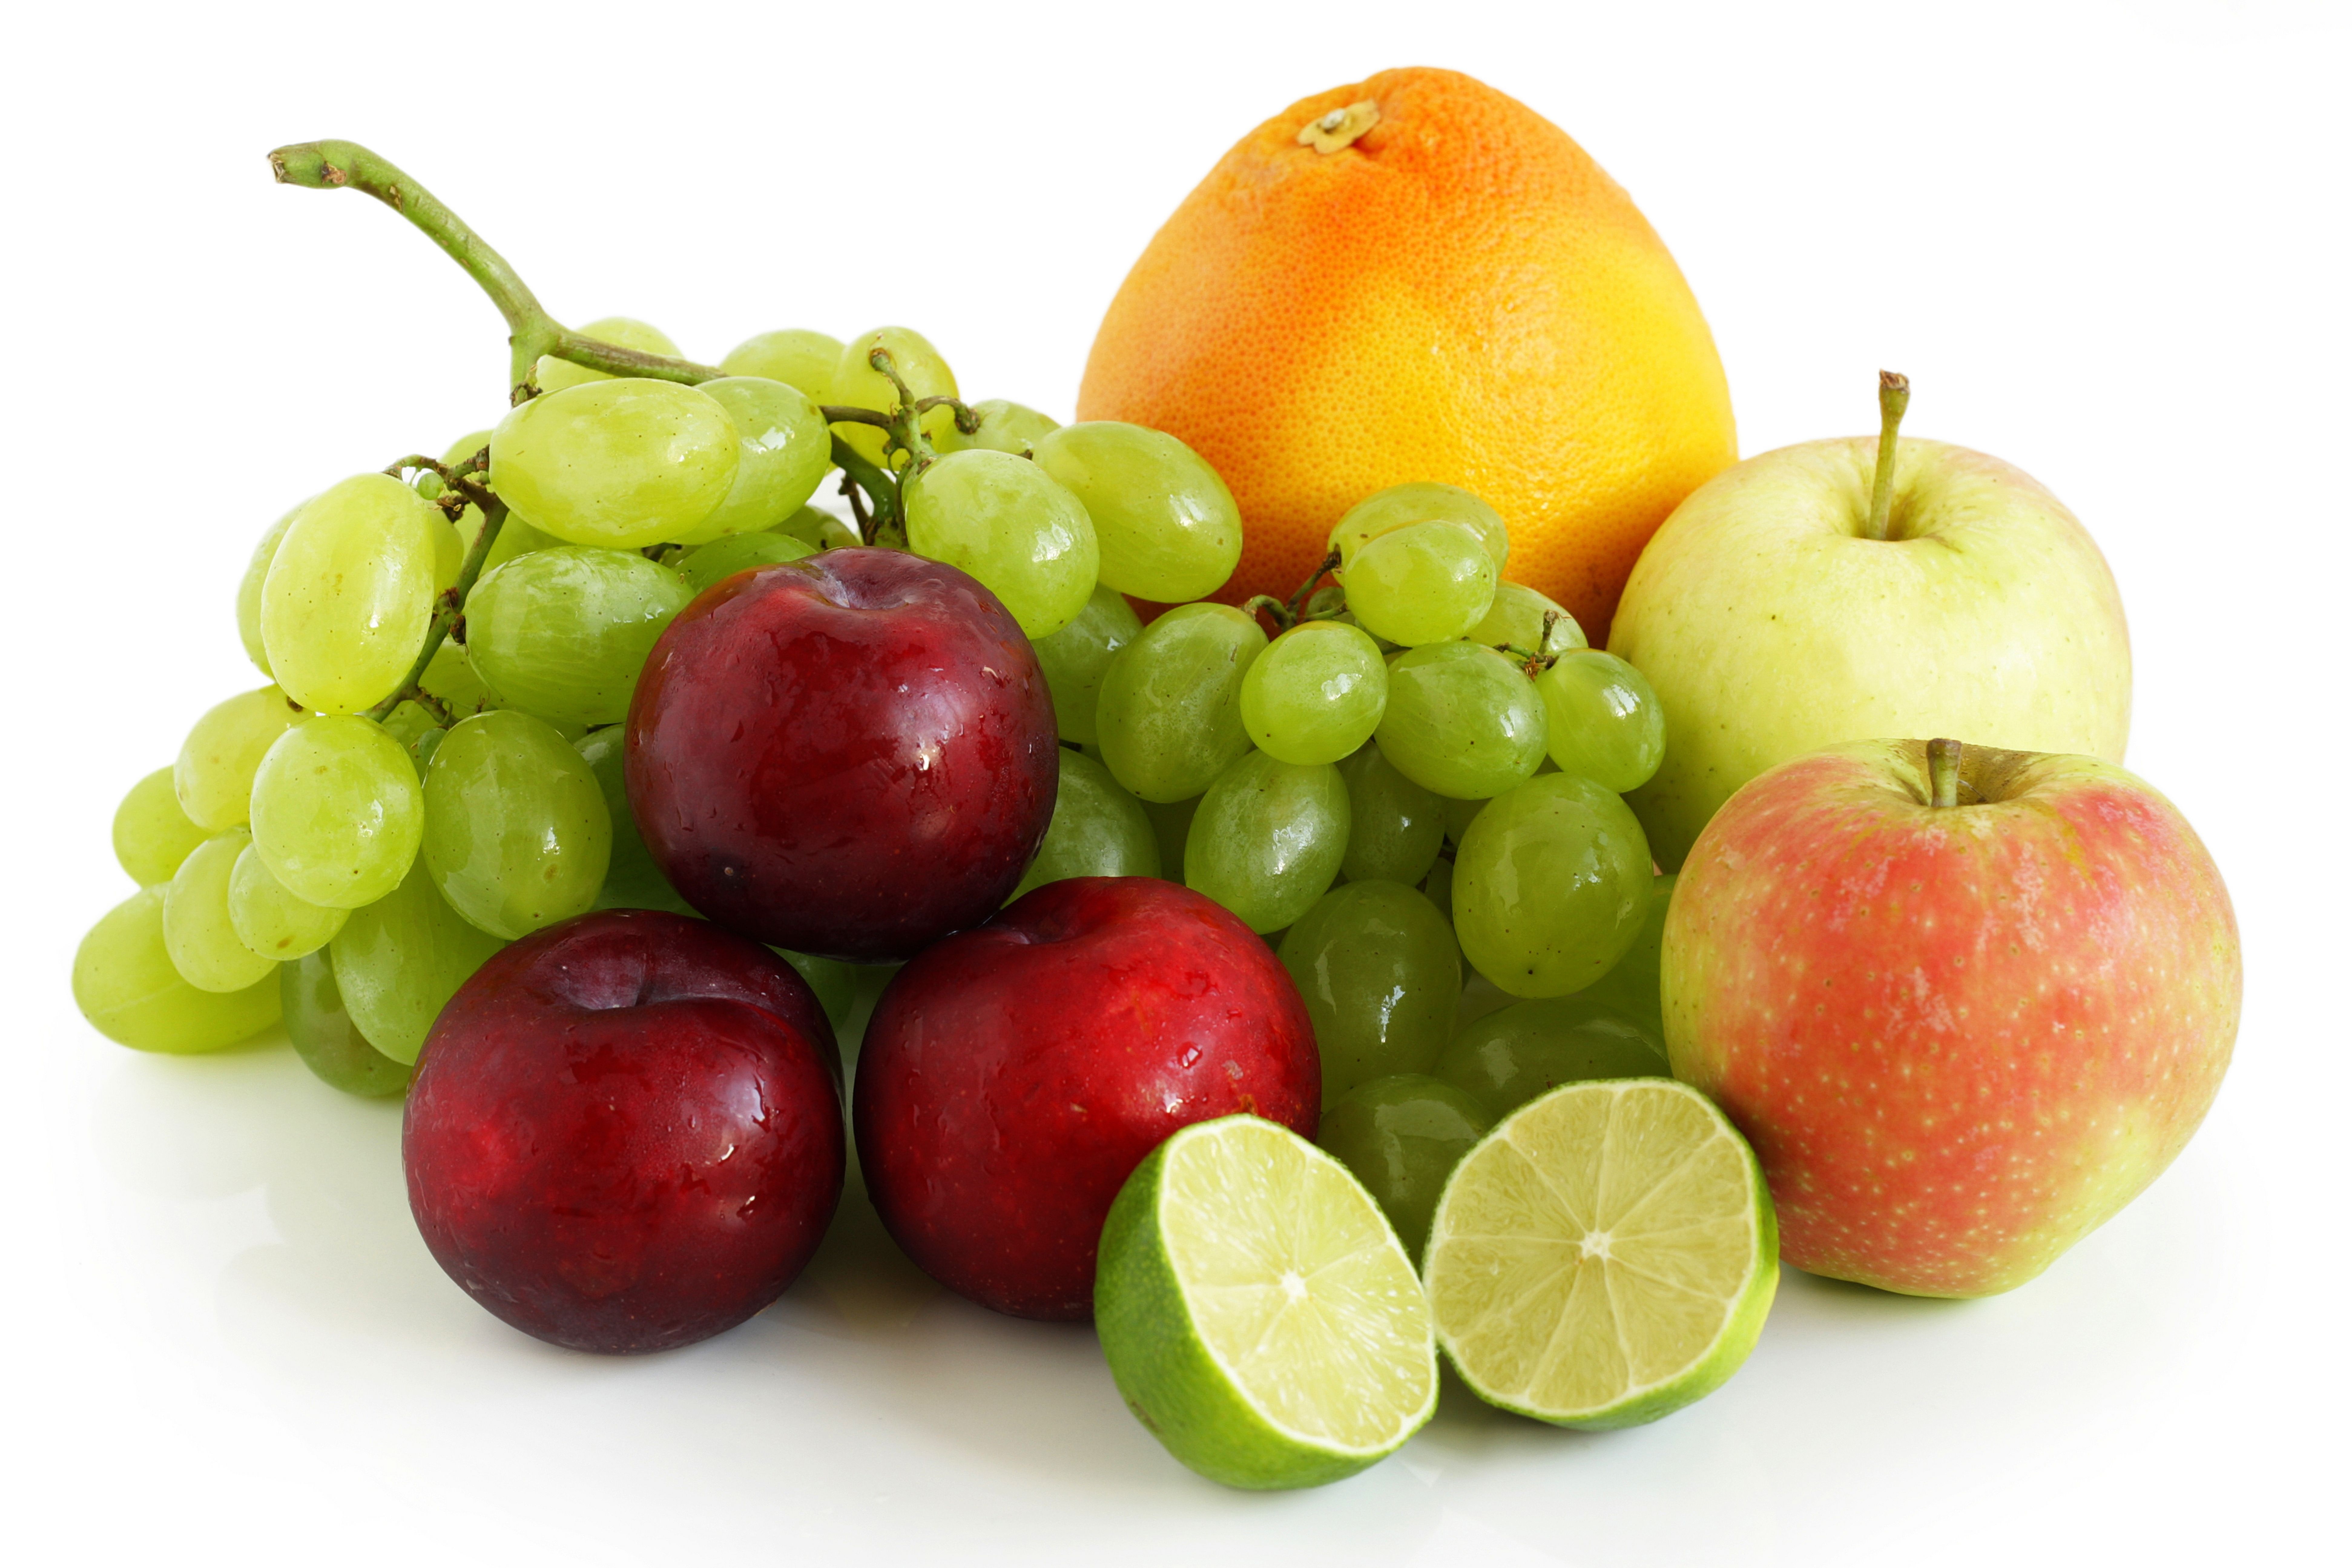
| fruit.jpg |
Tutorial 6- Clipping
10 x 10 150 resolution
Create a white background layer
Load your photos onto one layer above the background layer
Create an arrangement of photos in a tight grouping that fit the meaning of the word or shape you are going to clip.
Type the word or use the shapes tool to make a shape. Alter the size to fill up as much of the image as you can.
Make sure your type or shape layer is below your image layer.
In the layers palette, click on the small triangle and select "Create clipping mask"
Place the result on your tutorials page

|
|
|
Click the link on the left and choose two areas that interest you out of the ten listed.
On your photos page, list the two techniques and find one example on the internet that demonstrates the technique. Use your own camera to take a series of pictures that fit the two techniques. Always take more pictures than you think your need. Use your photoshop skills to improve or clean up the photos. Post your end results to the photos page. |
Tutorial 7 Review- 5 points
Copy and open the portrait of yourself from below in photoshop.
Use levels to do any adjustments to the photo to improve the lighting.
Use the healing tools to remove any blemishes you want to.
Use the pen tool to separate yourself from the background.
In the path tab, select the dotted circle icon to load your path as a selection.
Go to Layer>new via copy. You should see a new layer with just your face in your layer palette.
Apply a radial blur to the layer that contains both your face and background.
Use the fx to create an outer glow around your face only layer.
Type your name using the text tool. Use any fx on your name you like.
Download a brush from brusheezy.com and load into your brushes palette.
Select the brush, choose a diameter and a color.
Apply the brush to a new layer that is between your face layer and the layer that contains your face and background.
Create another new layer on top of your top face layer
Use the brush again but in a bigger size. Or, you may select a different, but related brush.
Lower the opacity on the brush layer that is on top of your photo..

Elements and Principles of Design
http://www.slideshare.net/kpikuet/elements-and-principles-of-art-presentation
http://www.slideshare.net/kpikuet/elements-and-principles-of-art-presentation

|
|

|
Visual Vocabulary for Art and Photography
| visual_vocabulary_for_photography.docx |
Charles Sheeler Assignment
| charles_sheeler_photography_assignment.doc |
| blank_canvas.psd |
Annie Leibowitcz

http://video.nationalgeographic.com/video/player/specials/photography-specials/photo-tips/macro-photo-tips.html
| elsa.jpg |
|
|
_
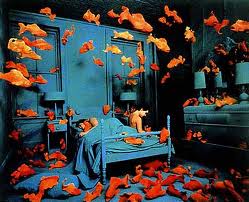
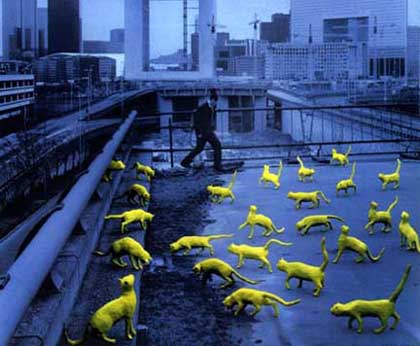
Sandy Skoglund (born September 11, 1946) is an American photographer and installation artist.
Skoglund creates surrealist images by building elaborate sets or tableaux, furnishing them with carefully selected small children and other objects, a process of which takes her months to complete. Finally, she photographs the set, complete with actors. The works are characterized by an overwhelming amount of one object and either bright, contrasting colors or a monochromatic color scheme.
Your Assignment- 1. Google Sandy Skoglund to get a more comprehensive idea of what her work is like. Place your favorite photo of hers on your weebly and write a short explanation of how that photograph is an example of Surrealist art.
2. Next, begin to plan your own take on Skoglund's work. You will need to photograph a setting for your installation. In that setting you should carefully arrange the items and people in the space to tell a story. Include one repeating item of your choice as much as possible in the setting. Use photoshop to make your setting monochromatic.
3. Take extra pictures of your setting but rearrange the repeating objects for each shot. MAKE SURE the camera remains in the same exact spot for each shot. If you have a tripod, use it!.
4. Use photoshop to combine the pictures so that the original setting remains and the changing objects are brought in from the other shots.
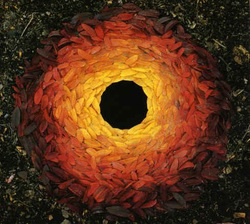 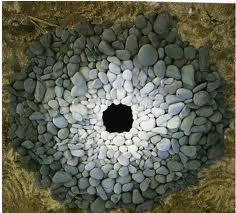 |
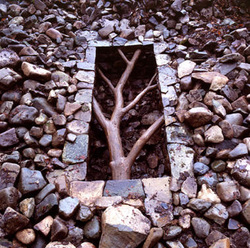
Andy Goldsworthy
 |
| sunflower.psd |
| meg.psd |
http://www.lesliesartgallery.eu/digitalart/rainbow.php

|
